Getting started with Homeschool Planner
Set up your Homeschool Planner account in under ten minutes — add your children, your school year, your books, and your first scheduled activity. A complete walkthrough of the welcome flow.
Welcome to Homeschool Planner. This page walks through the welcome flow, end to end. Five steps, each a minute or less. You can come back to anything later — only your name, household, and at least one child are strictly required before the planner has something to show you. Most parents finish setup in eight to ten minutes and are ready to plan their first week the same evening.
At a glance
- What you’ll do: five-step setup — name, household, children, materials, first activity
- Time required: 8-10 minutes for a full setup; 3-4 if you skip the optional steps
- Best for: brand-new parents on day one, or returning parents redoing setup for a new school year
- Skip if: you’ve already completed the welcome flow — return to Settings to edit anything later
What you’ll set up
Five short steps to get Homeschool Planner ready for your family, in this order:
- Tell us your name — so the rest of the app can call you something
- Set up your household — household name, your state, and the dates of this school year
- Add your children — at least one, with a grade and a colour
- Add what you use (optional) — books, websites, apps, or curricula
- Schedule your first activity — something recurring, like Math or Read-aloud, that should show up on the calendar
After step 5, you land on a setup overview that shows what’s done and what’s left. From there, Continue to planner → opens the week.
Step 1 — Tell us your name
The first screen of Homeschool Planner asks What should we call you? with two fields: First name and Last name. Both required. You can change either later under Settings → Account, so don’t overthink it.

When both fields are filled, the Continue → button activates. The name you enter shows up in your account chip in the top-right of the planner, on printed weekly sheets, and in any auto-generated reports.
Step 2 — Set up your household
This step has three fields and is the foundational step for the rest of the app. You’re telling the planner three things: what to call your family, where you live, and what dates this school year covers.
Household name
Pre-filled with your last name plus Family — for example, Thomas Family. Edit it if you’d rather it say something else. This name shows up in your account menu and on printed sheets. Some families use The [Surname] Homeschool, [Surname] Academy, or just The [Surname]s — whatever feels right.
State (optional)
Pick your state from the dropdown. Setting your state lets the app auto-flag the subjects your state requires for each child’s grade — useful for compliance-heavy states like New York, Pennsylvania, Massachusetts, North Carolina, and Ohio.
You can skip this and pick a state later from Settings → Family. If you skip, your children still get a default subject set (typically seven subjects per child) — just not state-tailored. Either way, you can refine the per-child subject mix later from Settings → Subjects.
Active school year
Two date inputs — start and end. Drives which weeks show in the week view, when vacations land, and how instructional days are counted on compliance reports.
Setting up before June? A “Planning next year? Use 2026–27” button swaps to the next school year in one click — useful if you’re setting up in spring for the upcoming fall.

The Continue → button activates once household name is filled and the end date is after the start date.
Step 3 — Add your children
This is the only step that’s strictly required beyond your name. You can’t open the planner without at least one child added.
For each child, you’ll fill in:
- Avatar — click the round avatar to pick a face from a generated library. You can also upload a real photo later from the children list.
- Name — required. Just a first name is fine.
- Birthday — required. Pre-filled 8 years before today; adjust for older or younger children.
- Grade (optional) — a row of chips from K through 12.
- Colour — Sage, Gold, or Clay. Each child’s colour shows up on their lane in the week view, on their avatar, and on printed sheets.
Click the Add control to save. The child appears above the form and the form clears so you can add another. Siblings get separate plans, subjects, and progress.
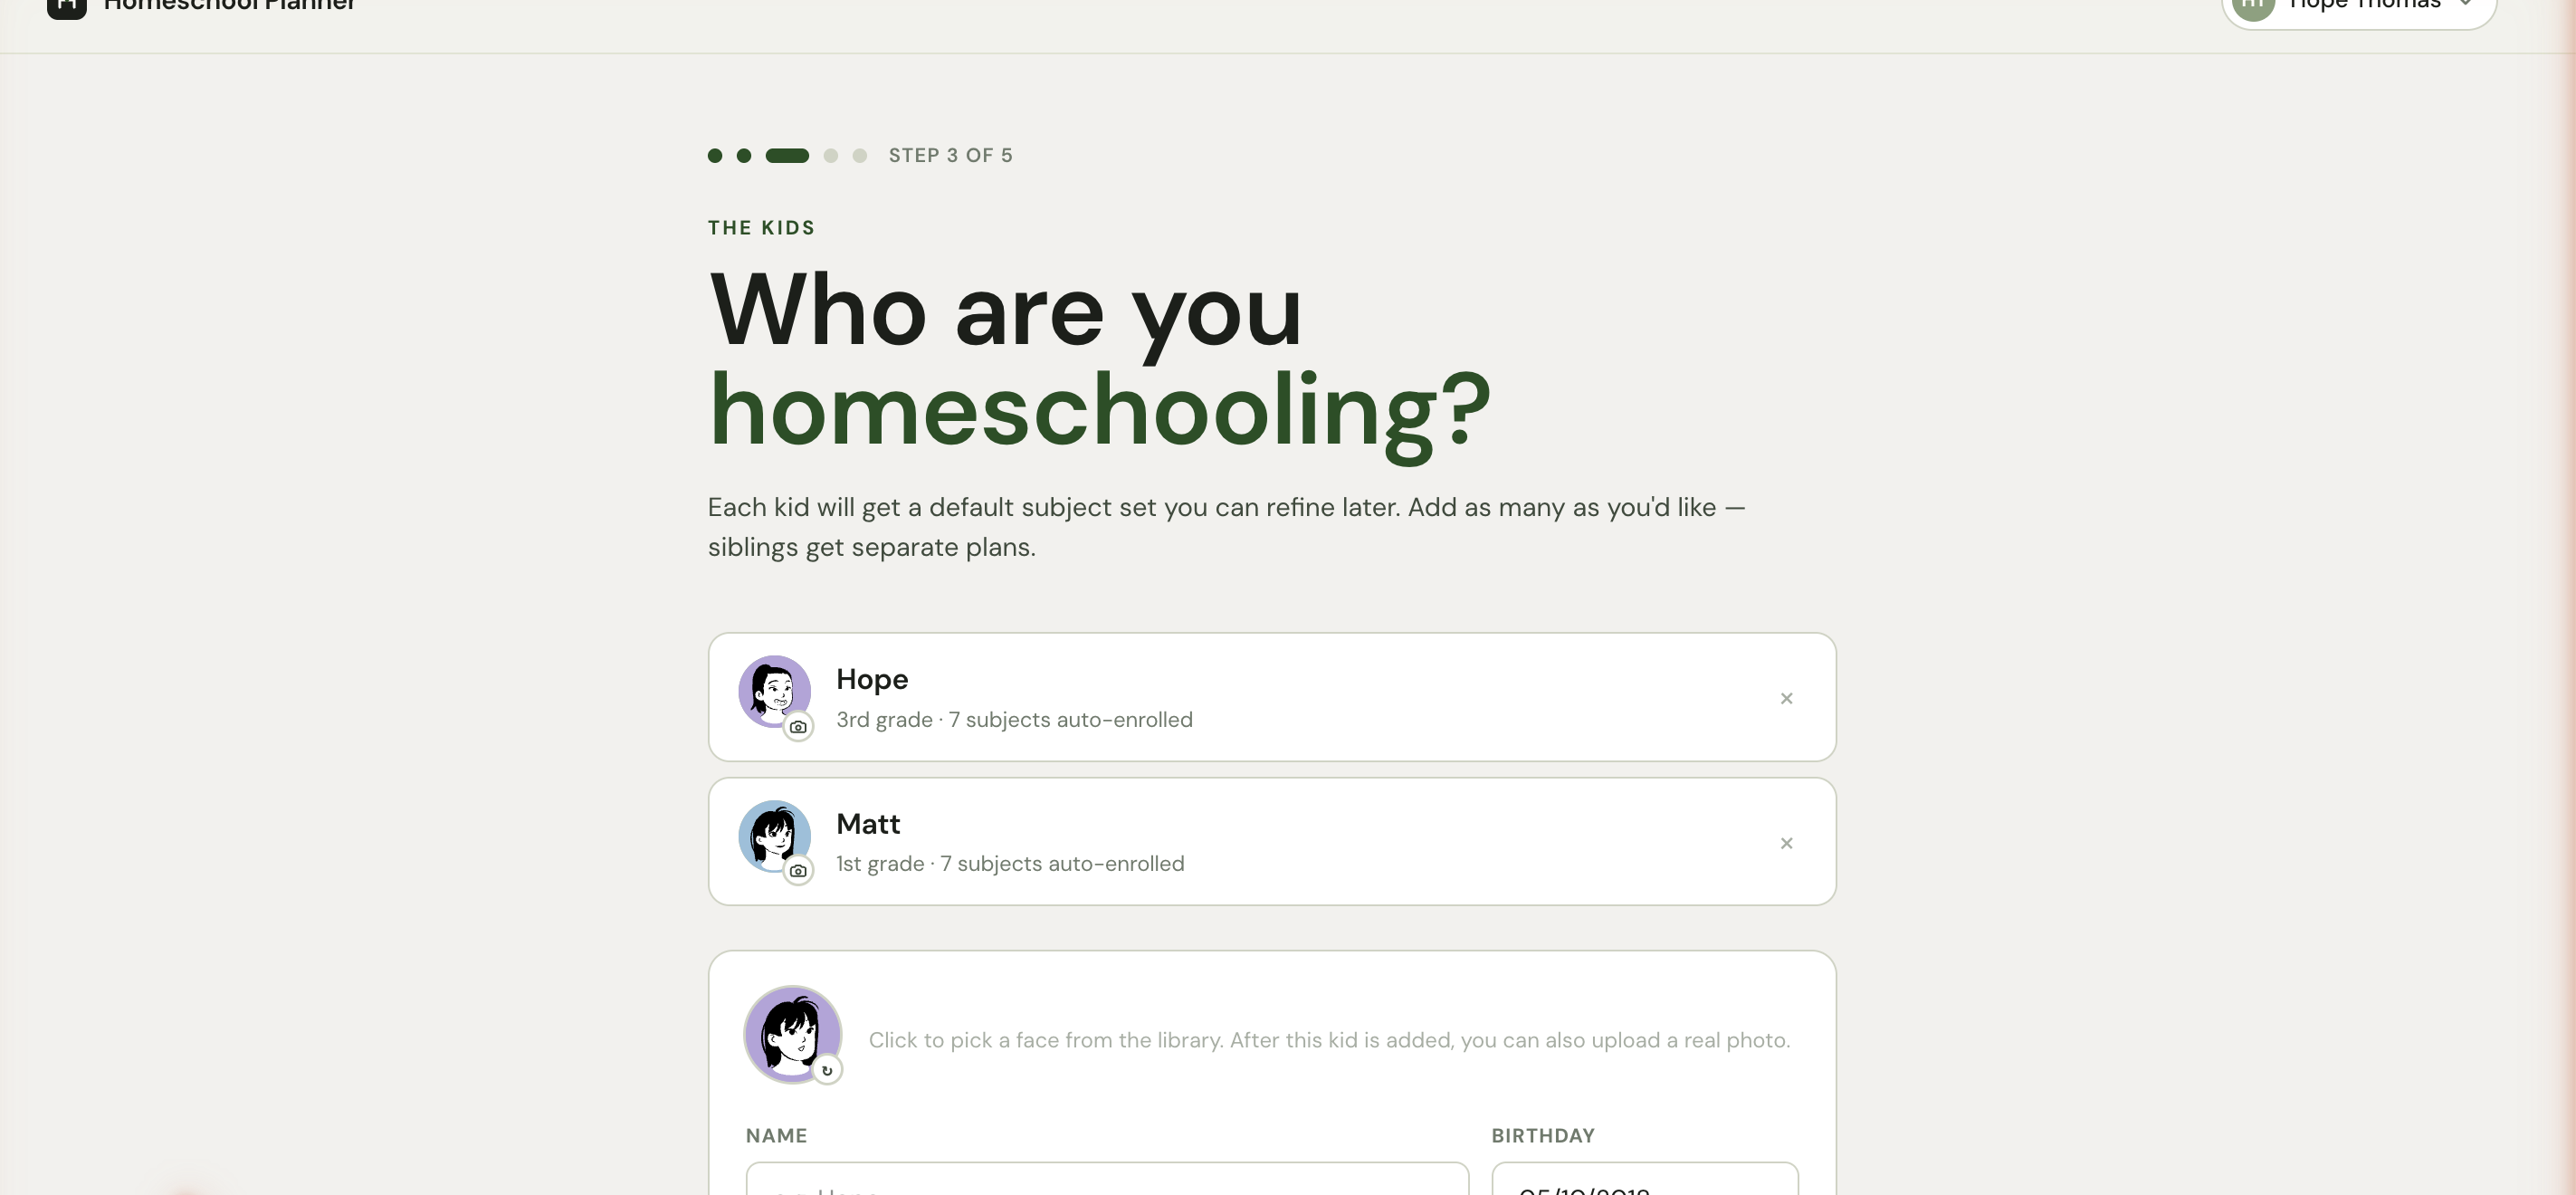
The status text below the form tracks your progress: “2 children added — continue when ready.” When you have at least one, Continue → activates.
Step 4 — Add what you use (optional)
This step is your bookshelf. Add any book, workbook, website, app, or curriculum you plan to use. You don’t need to add everything on day one — materials live in Settings → Materials and you can grow the shelf any time.
For each material, the form takes a format (Book or workbook · Website or app · Something else), a name, a subject, the children it’s for, the school year, and optional notes.
If the material has a sequence — chapters, units, lessons — you can attach a lesson plan now or later. Smart-import (AI-assisted) reads a pasted table of contents or a phone photo into a list of lessons; or add lessons manually; or just enter a total lesson count.
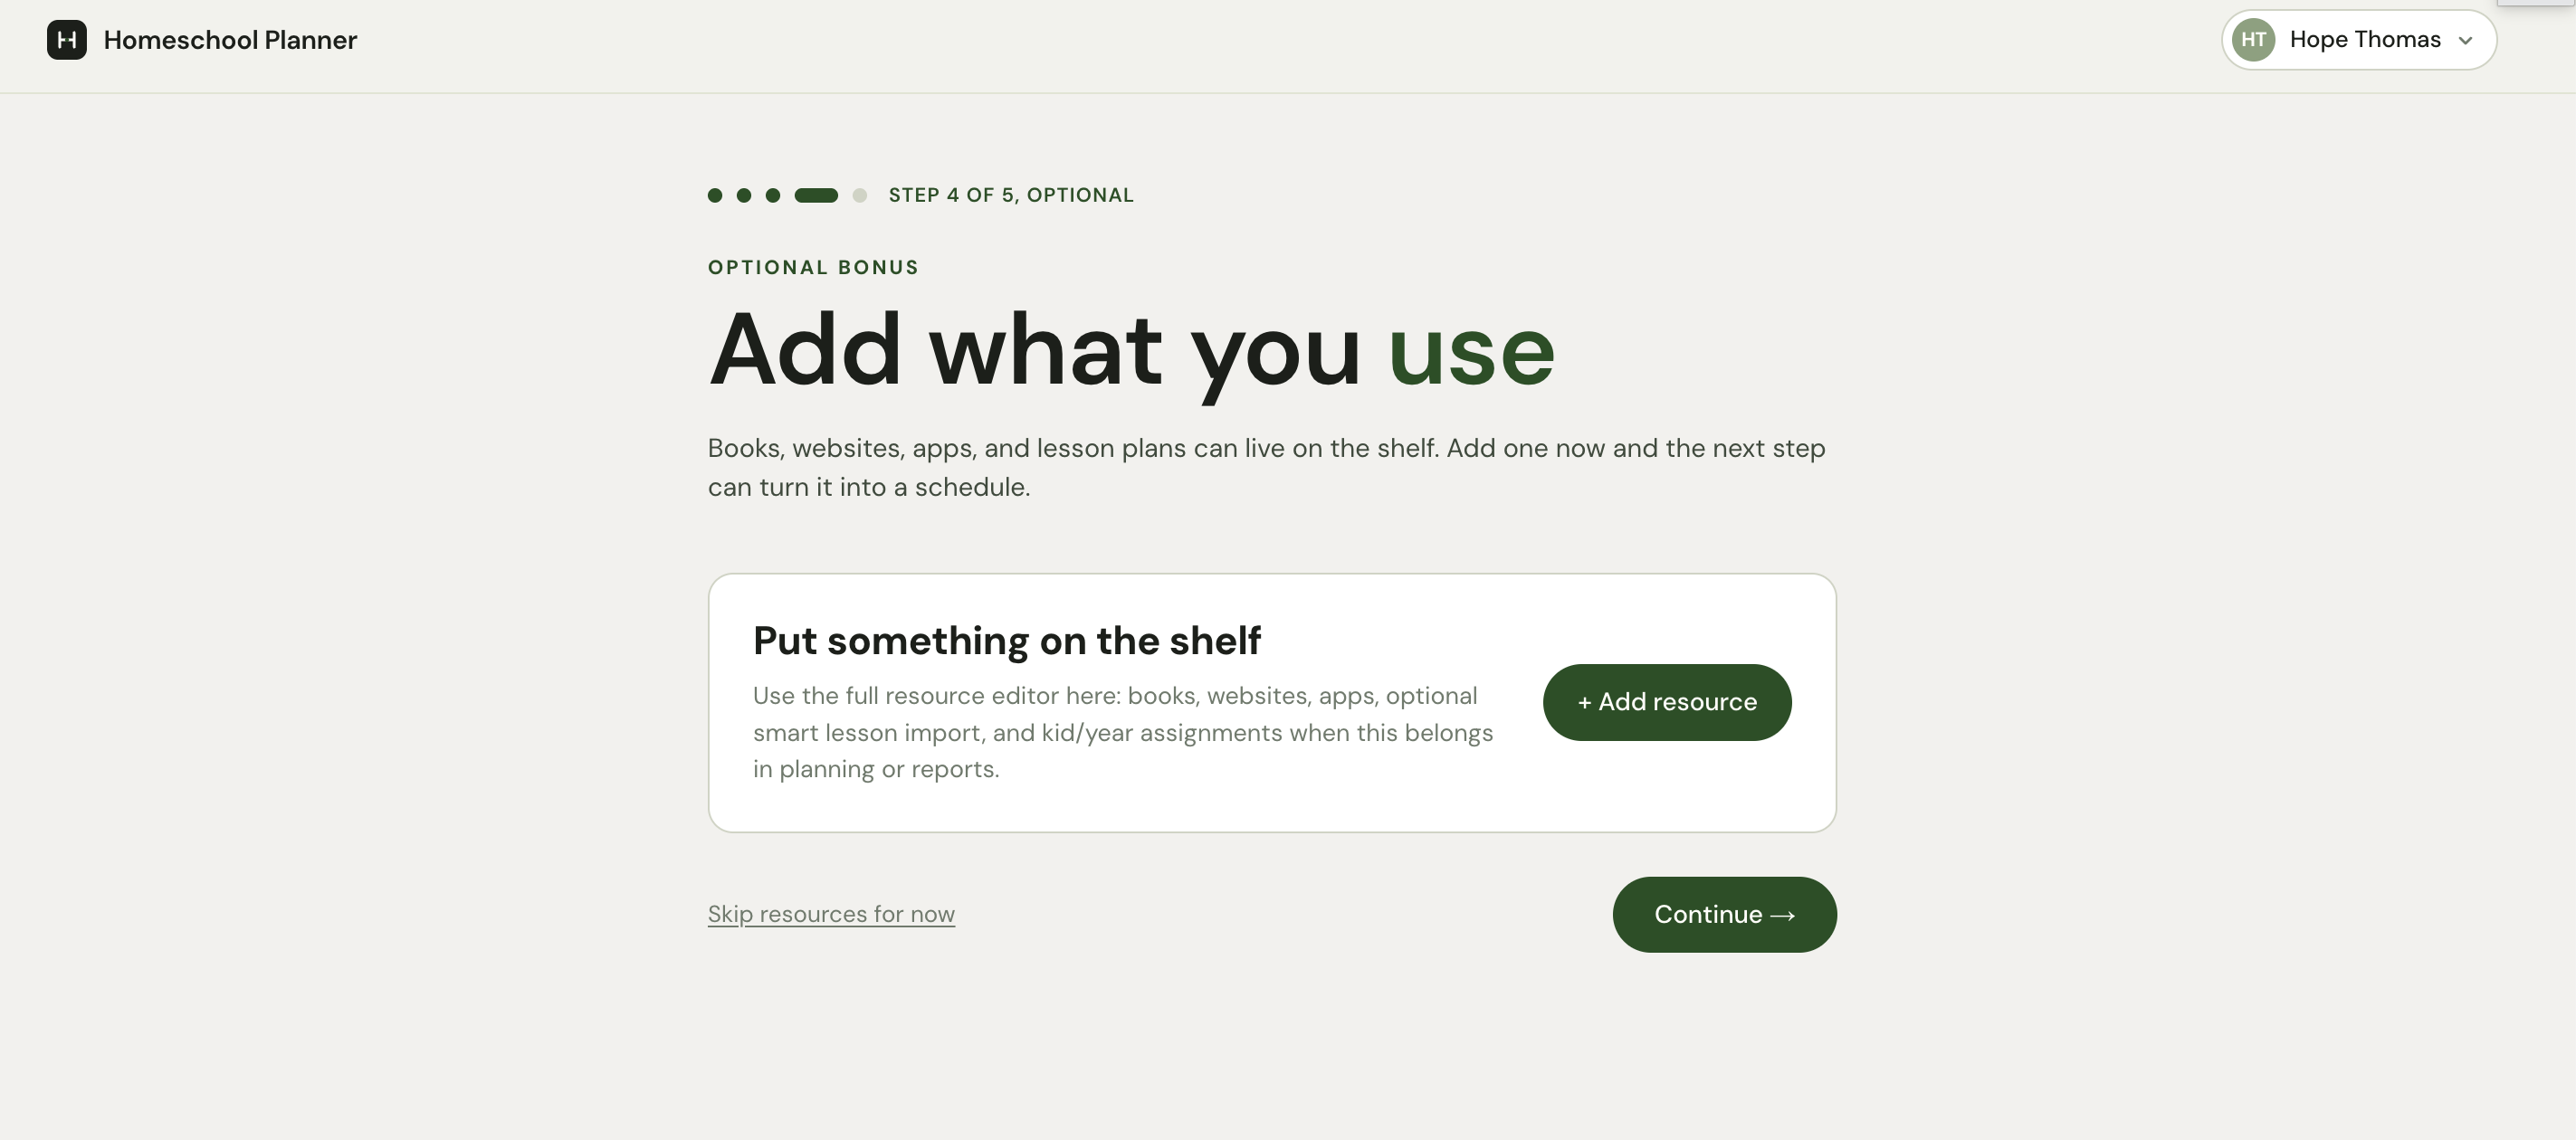
When you’re done — or if you want to skip this — click Continue →. There’s also a Skip resources for now link at the bottom.
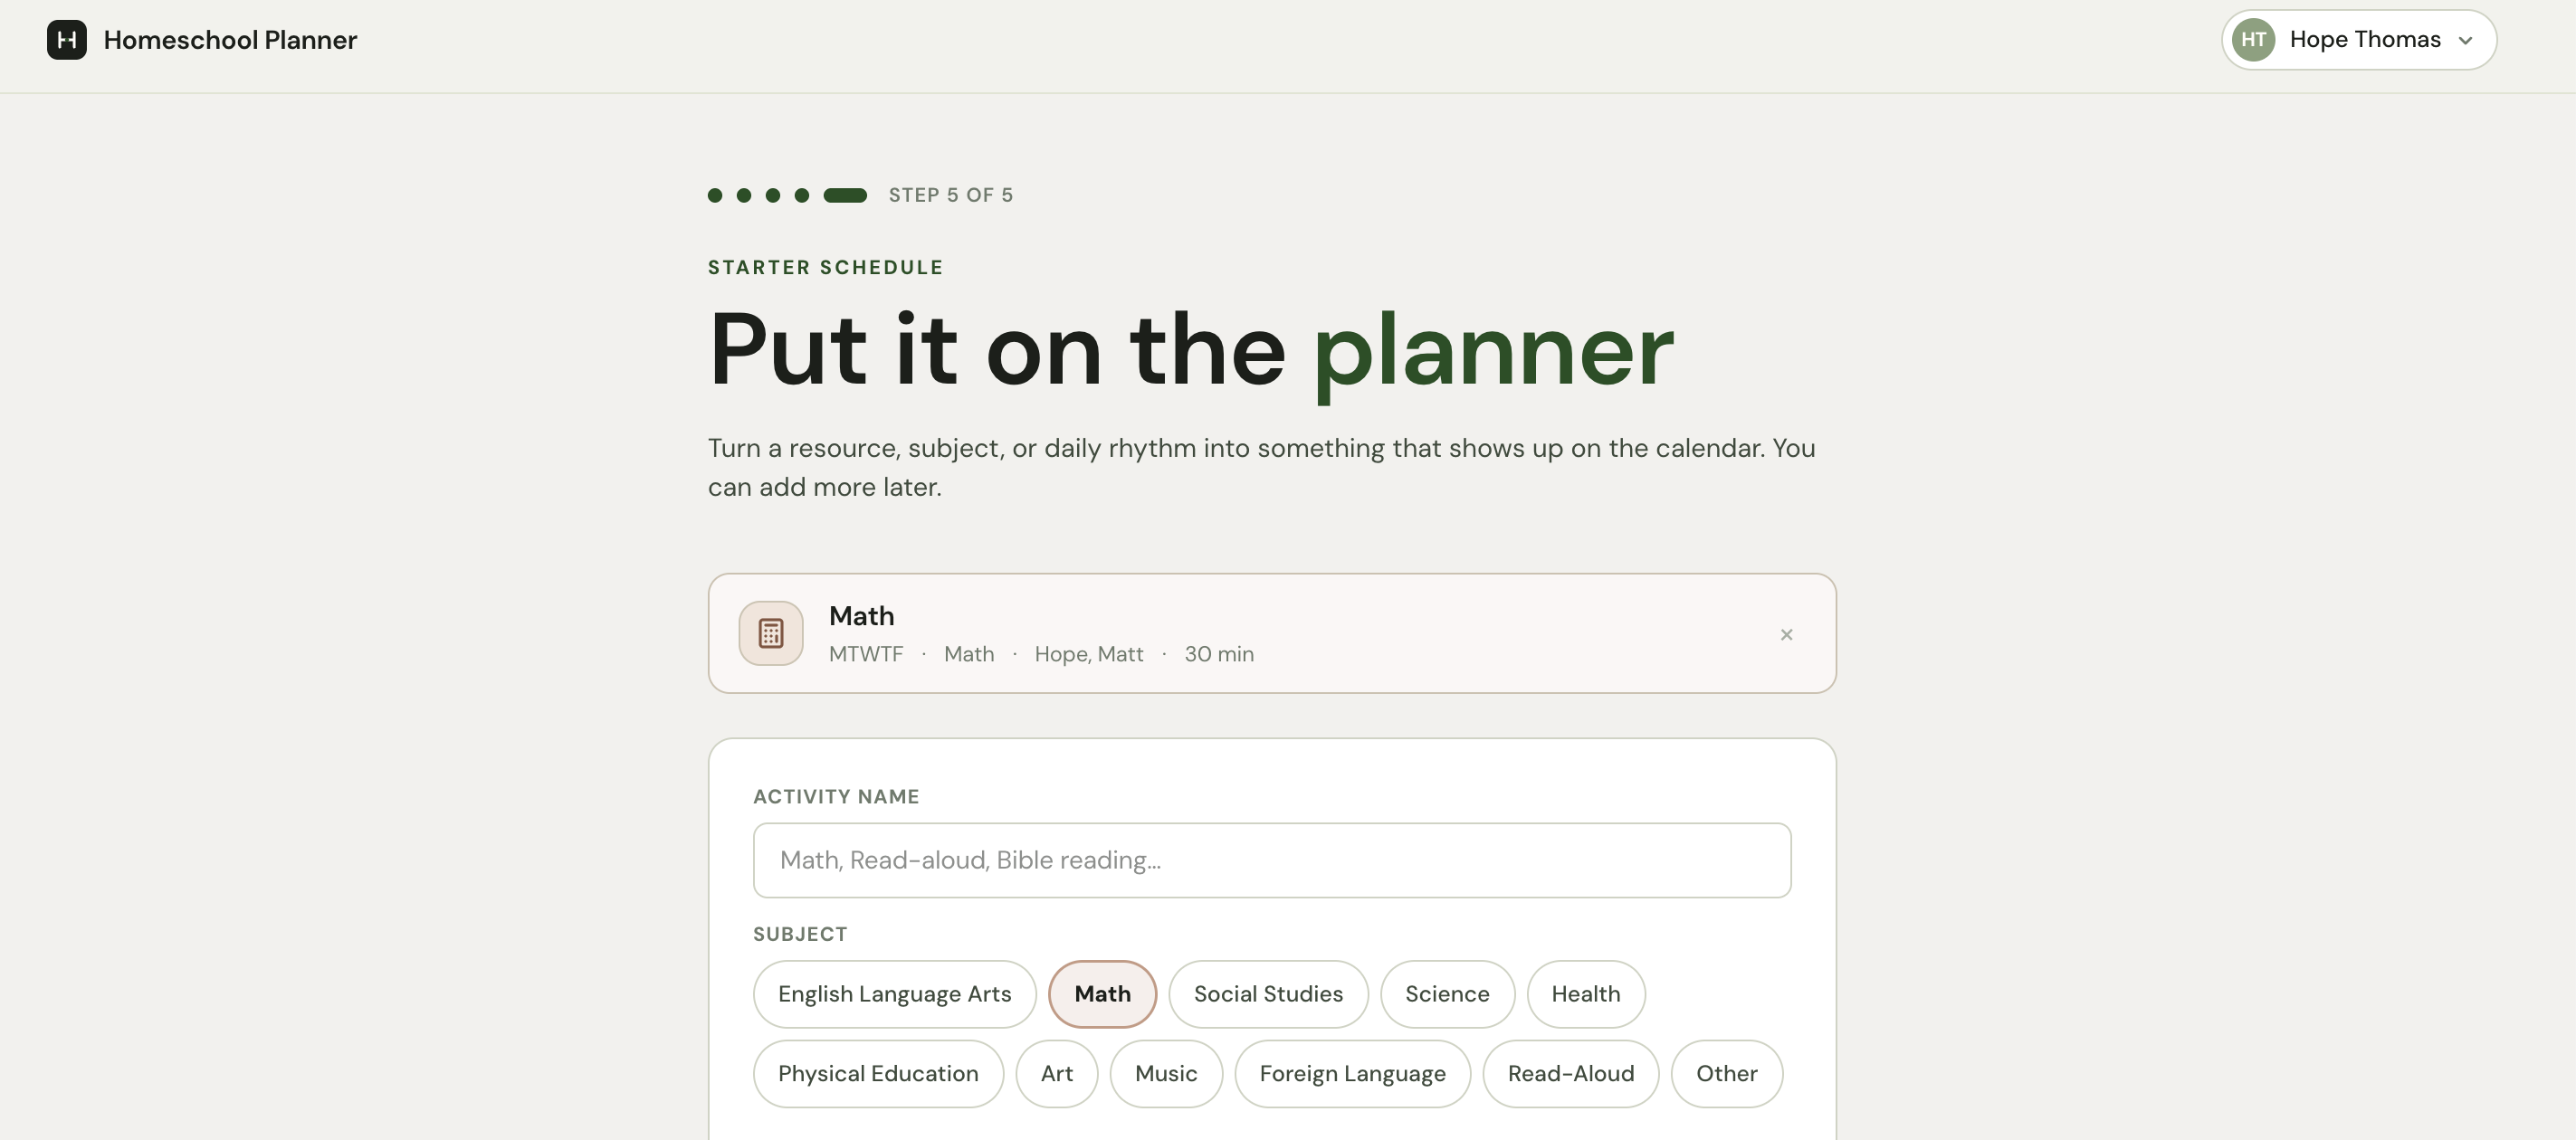
Step 5 — Schedule your first activity
A scheduled activity is anything that recurs each week — Math, Read-aloud, Bible reading. Homeschool Planner turns each one into a calendar entry per child per scheduled day.
The form takes an activity name (pre-fills with Math on first use), a subject, the days it recurs (defaults to Monday–Friday), the children it’s for, and an optional duration in minutes (defaults to 30). If you added a material in step 4, Start from a resource auto-fills subject and children.
A live preview below the form reads something like “Math will appear for Hope and Matt on Mon, Tue, Wed, Thu, Fri.” Click the Add control to save. Add more, or click Open the planner → to finish.
What’s next
You’ll land on the setup overview at /welcome showing all five steps with their status. Anything you skipped is reachable from this page or from the corresponding Settings page later. From here, Continue to planner → opens your week — Homeschool Planner is set up and ready to run.

Now that Homeschool Planner has your children and your first activity, a reasonable next read:
- The week view — How the Mon–Fri grid works, by-child and by-subject views, filters, and what to click first
- Your children — Editing children, uploading real photos, removing a child later
- Importing a curriculum — Three ways to import a year-long lesson sequence (paste, photo, ChatGPT)
Common questions
What if I’m setting up in the middle of a school year? No problem. Set the school year dates to the actual range you’ve already been homeschooling (e.g., Sep 1 to today is fine). Past sessions can be backdated through Log what happened; future sessions schedule normally.
Can I add another parent to the same account? Not yet — Homeschool Planner is a single-parent account at the moment. Multi-parent support is on the roadmap. For now, both parents can sign in to the same account from different devices.
What if I want to skip a step and come back later? Each step has a Continue button that lets you proceed even if optional fields are empty. Steps 1, 2, and 3 are required; steps 4 and 5 can be skipped entirely. Everything’s editable from Settings later.