Your children
Edit, add, or remove children in Homeschool Planner. Walks through Settings → Family — household name, state, names, grades, birthdays, and colours.
The children you added during setup live on Settings → Family in Homeschool Planner. The same page handles your household name, the state you homeschool in, and the list of children — adding new ones when family circumstances change, editing existing ones as grades and birthdays shift, and removing one if a child enrolls in school for a season or graduates out of homeschooling. Most parents only visit this page once or twice a year.
At a glance
- Where it lives: Settings → Family
- What it does: holds your household name, your state, and the list of children
- Best for: start-of-year updates, mid-year additions, fixing typos, removing a child who enrolled elsewhere
- Skip if: your household and child list haven’t changed since setup
Your household
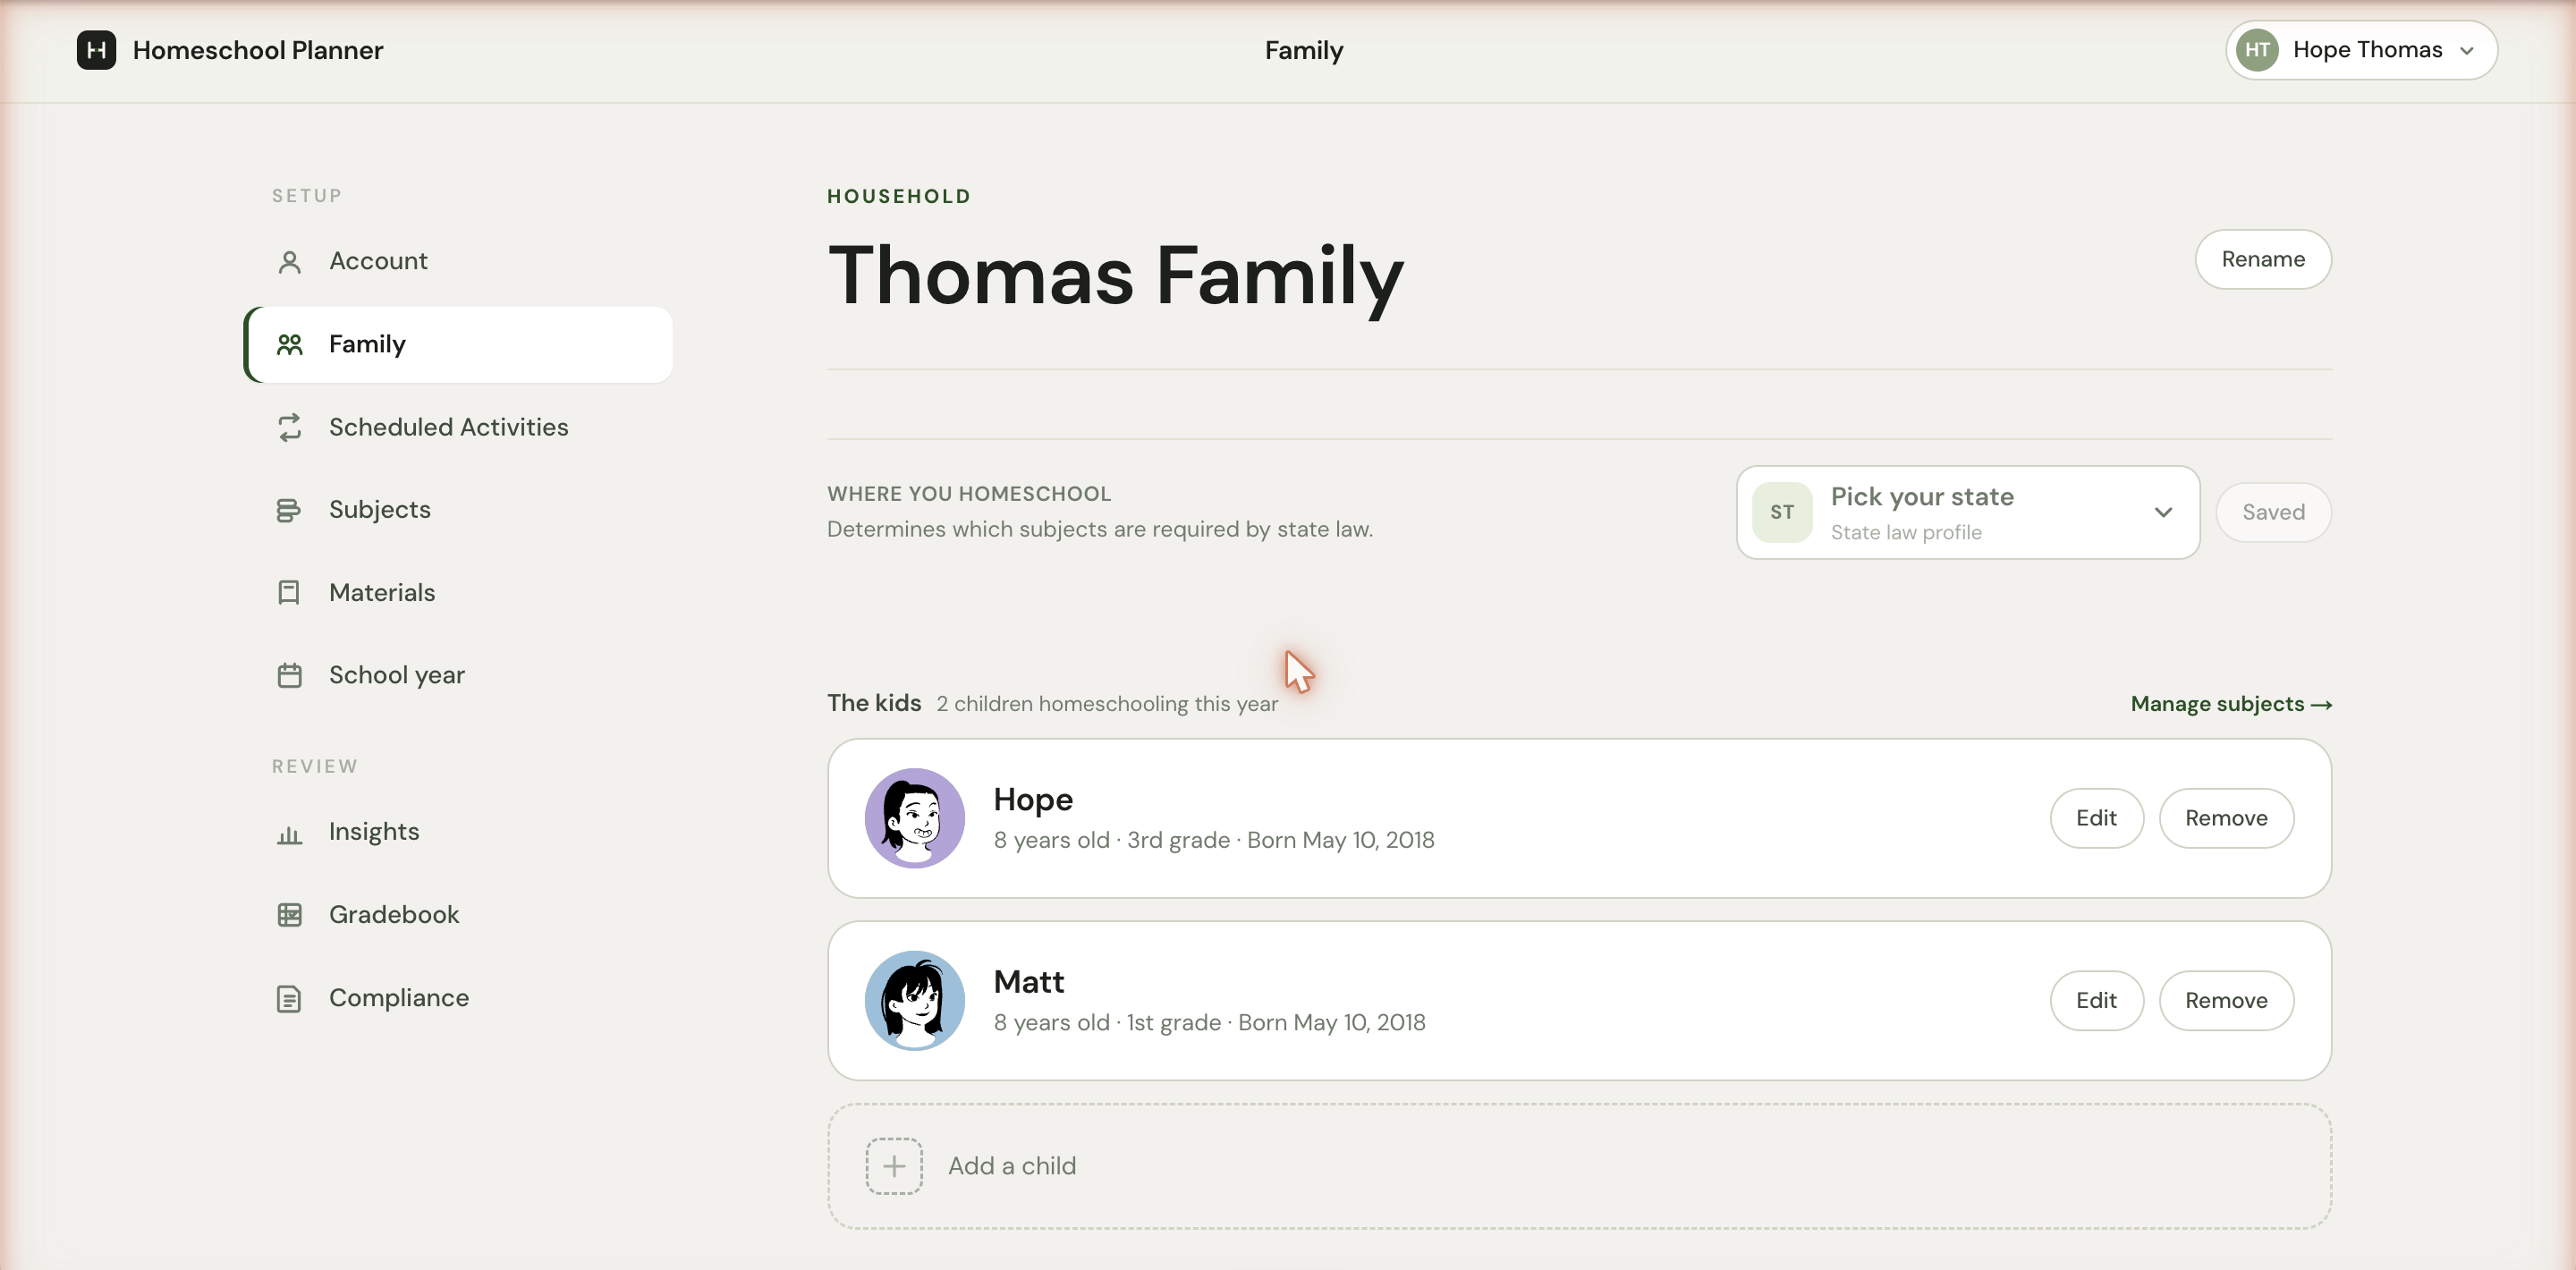
The Household heading at the top shows your family name — Thomas Family, The Robinsons, The Bennets — followed by a Rename control. Click it to open an inline editor and change. The name appears on printed weekly sheets, in the Account menu, and in any auto-generated reports.
Below it, the Where you homeschool state picker is the second piece. Setting your state lets the planner auto-flag the subjects your state requires for each child’s grade — useful for compliance-heavy states like New York, Pennsylvania, Massachusetts, North Carolina, and Ohio. A small Saved chip appears after each change. If you set a state during the welcome flow, this is where you change it later (for example, if you move).
Setting your state doesn’t enroll you in anything; it only changes which subjects show up as Required vs. Optional on the Subjects page for your children’s grades.
The children list
The section below the household lists every child you’ve added. The header tells you how many are children homeschooling this year — the count includes only children with at least one Required or Optional subject enrolled, so a child with all subjects toggled to Off won’t appear in the count. The Manage subjects → link on the right jumps to the per-child subject matrix.
Each child is one card with their avatar, name, N years old · grade · Born MMM D, YYYY, and Edit / Remove controls.
Editing a child
Clicking Edit expands the card in place into a form with four fields:
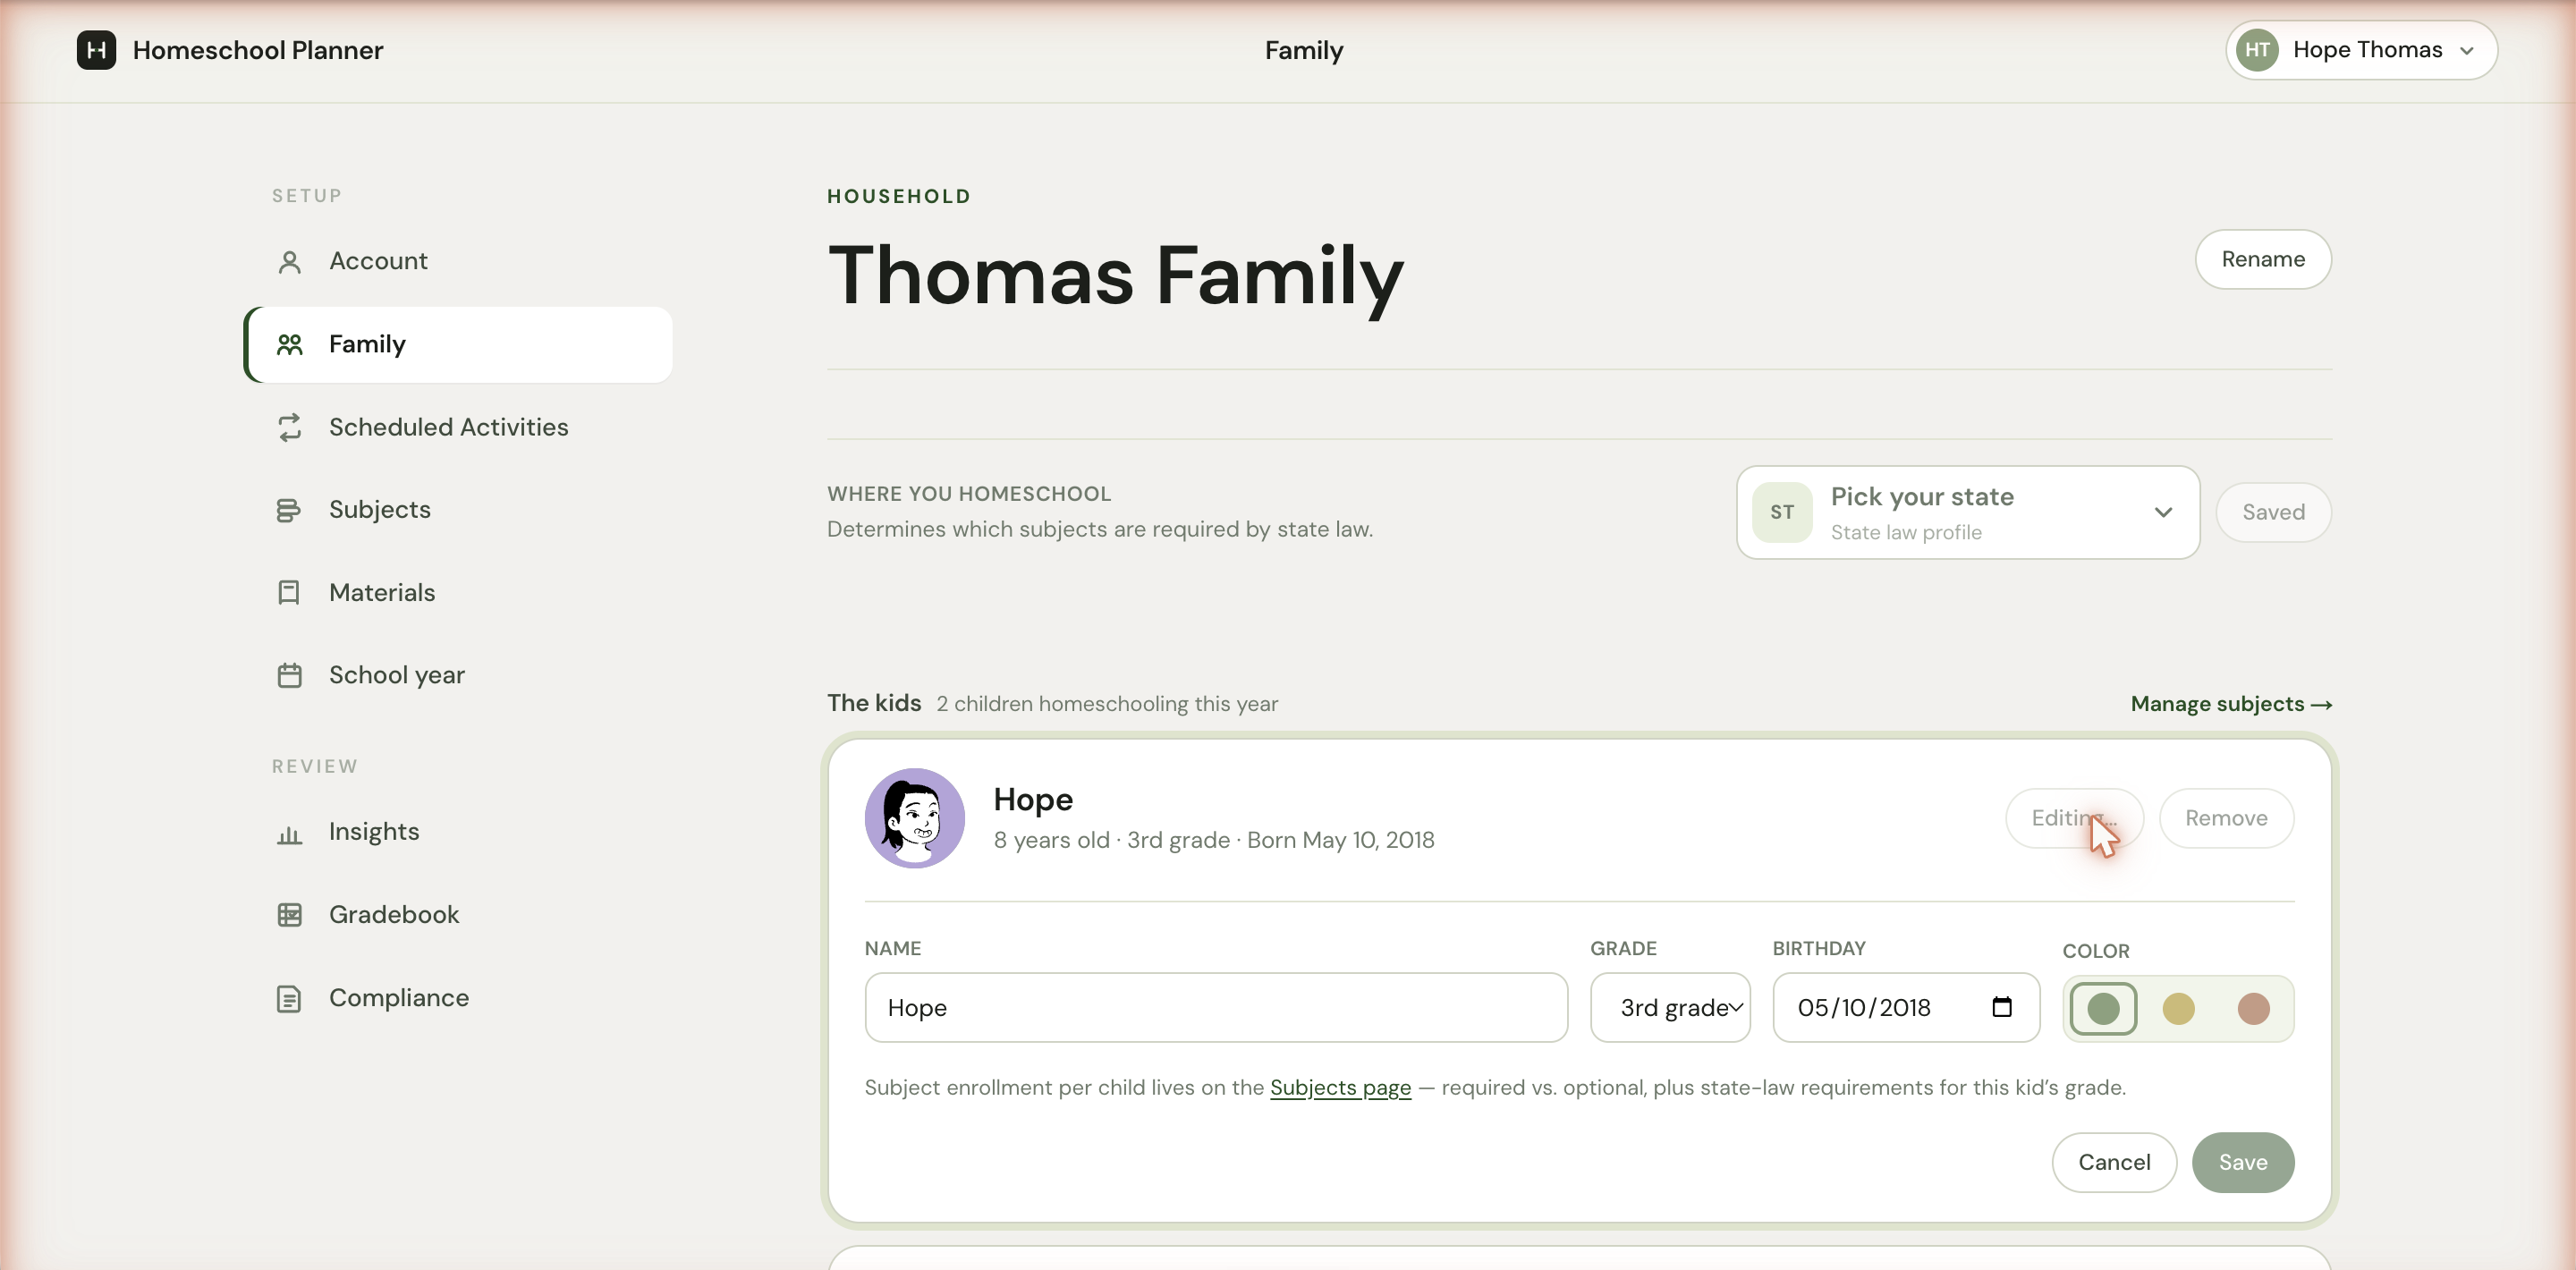
- Name — required. Just a first name is fine; some families use a middle name to disambiguate two children with the same first letter.
- Grade — dropdown from K through 12. Drives the state-law required subjects on the Subjects page, and shows on printed sheets.
- Birthday — date input. Used for the N years old age display, and for compliance reports that ask for a date of birth.
- Color — three dots: Sage (green), Gold, or Clay (rust). The colour shows on the child’s lane in the week view, on their avatar in the planner, and on printed sheets — try to give each child a different colour so the week view stays readable at a glance.
Save writes the change immediately. Cancel discards. Subject enrollment isn’t editable here — it has its own page so the per-child matrix gets the screen real estate it needs.
Adding a new child
The Add a child control at the bottom of the list opens the same kind of inline form, blank, with an Add button at the bottom.
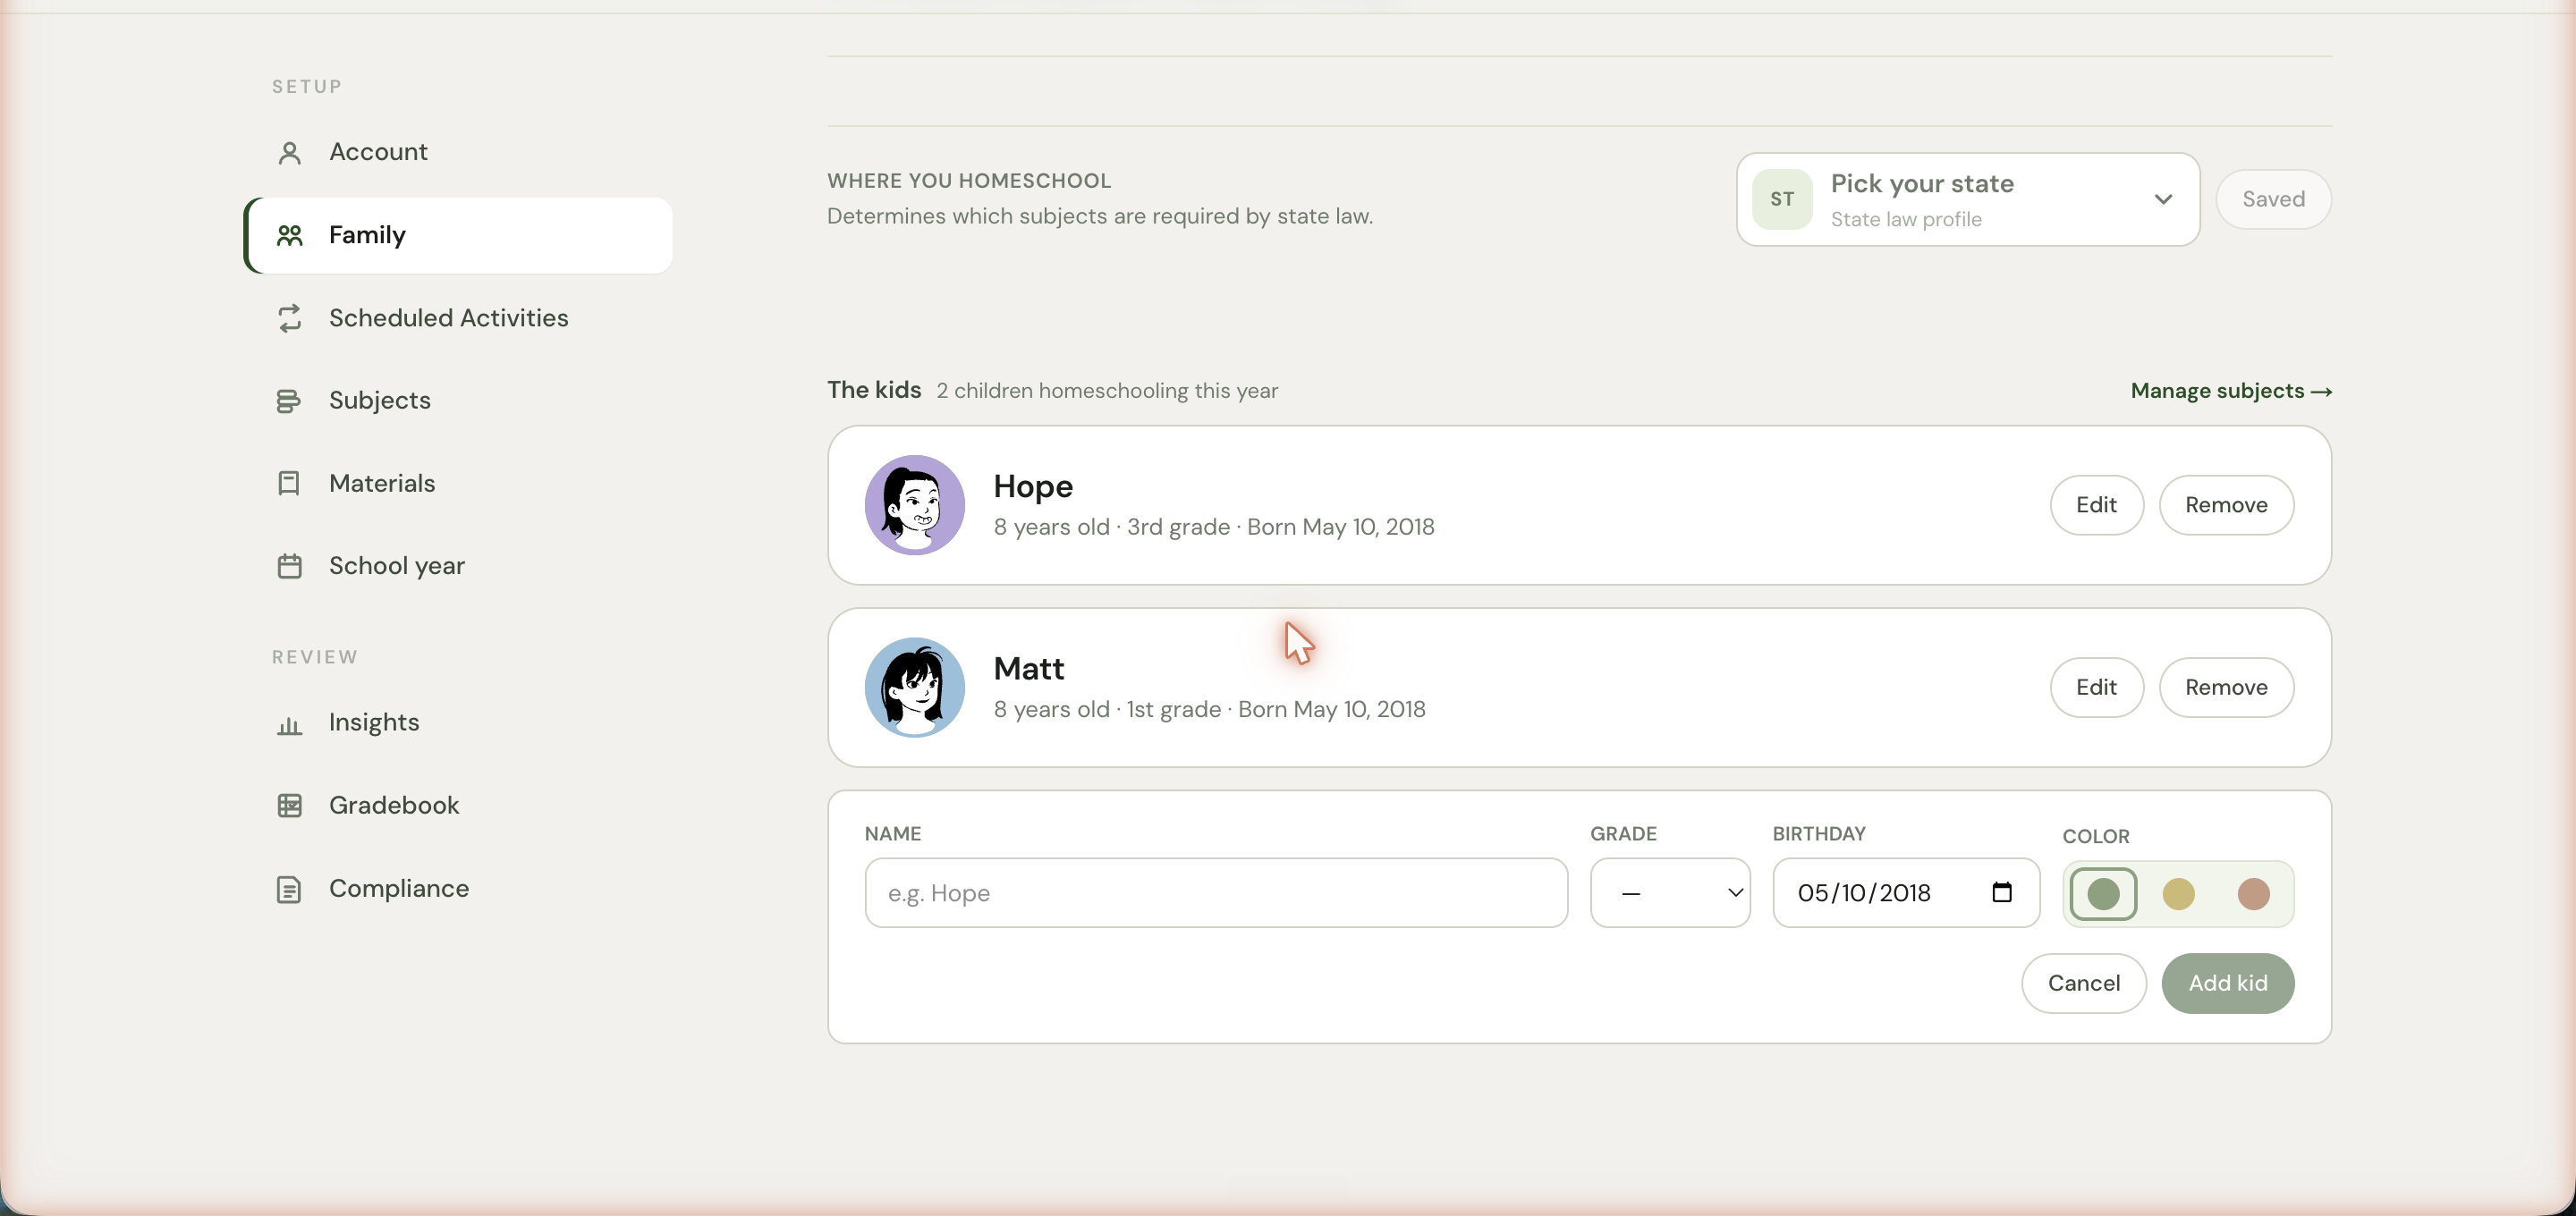
A new child gets a default subject set the moment they’re added:
- If you’ve set a state, the state-required subject set for their grade. Required subjects auto-tag as Required; the rest fall to Optional.
- Without a state, a baseline mix — typically ELA, Math, Science, Social Studies, and a few electives. Refine the per-child enrollment from the Subjects page.
Removing a child
The Remove control on each card asks for confirmation, then takes the child off the planner. Their completed work, gradebook entries, and compliance history are preserved on your account so reports remain accurate. Future scheduled sessions for that child stop generating; existing one-off blocks already assigned to them stay (so an end-of-year report still includes their completed work).
Special situations
A few situations come up often enough to address explicitly:
A child between two grade levels
Some children are advanced in one subject and behind in another, or are simply on a non-standard grade for their age. Pick the higher of the two grades on the form. The grade is mostly used to filter state-required subjects; nothing forces a child to do every grade-level subject. You can refine each subject’s enrollment per child on the Subjects page.
A teen who only needs some subjects
Adolescents in dual-enrollment, doing online classes, or working through a hybrid schedule might only need the planner for a few subjects. Add the teen as a child, then turn off the subjects you’re not tracking (set them to Off on the Subjects page). They’ll only appear in scheduled activities and the planner where you’ve enrolled them.
A toddler tagging along to lessons
You don’t have to add toddlers as children just because they’re present during read-alouds and crafts. Tag-along siblings show up automatically in any activity scoped to Entire family, since family-scope activities don’t break down by individual child. Add a toddler as a child only when you’re ready to track their progress separately.
Twins or close-in-age siblings
Two children at the same grade can use the same scheduled activities, materials, and routines — but giving them different colours makes the week view much easier to read. Sage for the older twin, Gold for the younger means a glance tells you whose card is whose.
What changes downstream
When you edit a child, several places update:
- The week view updates the child’s lane label, colour, and stats.
- The day view updates the filter chip for that child.
- Subjects keeps the existing matrix, but adjusts the state-required defaults if grade changes.
- Scheduled activities assigned to that child continue to fire, with the new name on each session.
- Printed sheets use the new name, colour, and grade on the next print.
For most edits, you don’t need to do anything else — the planner picks up the change everywhere it matters.