The week view
A walkthrough of the Mon–Fri grid in Homeschool Planner — by-child and by-subject views, filters, the day view, the settings panel, and keyboard shortcuts.
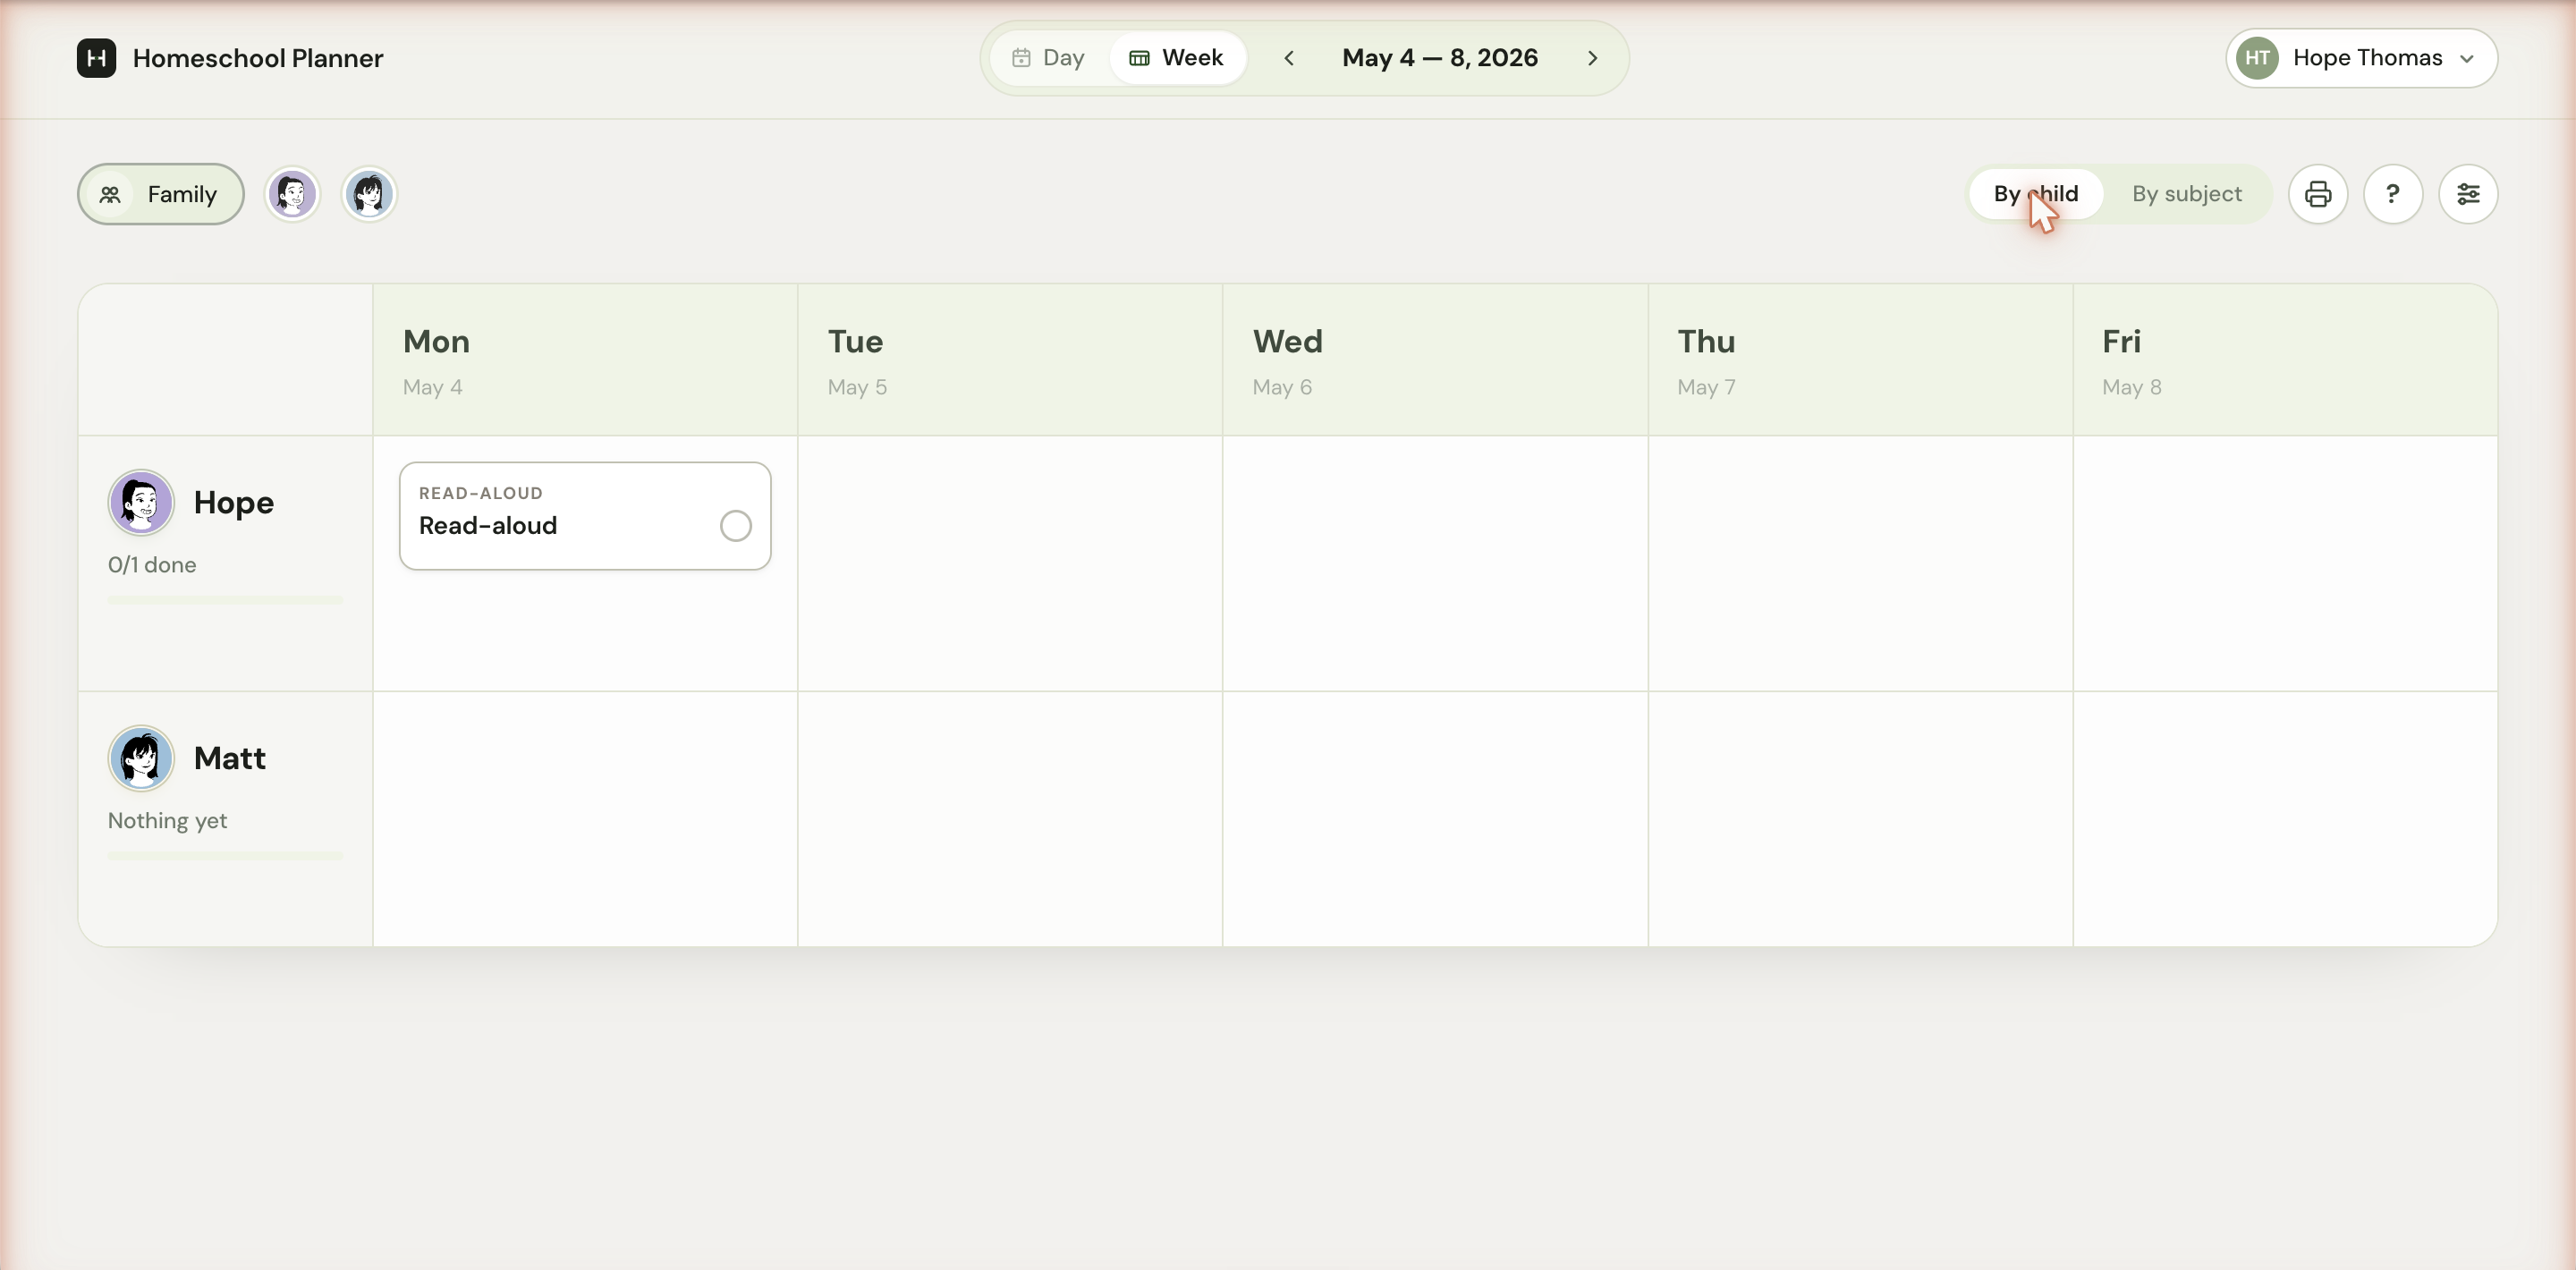
The week view is the home base of Homeschool Planner. It’s where you spend most of your time once setup is done — five columns (Mon–Fri by default), one row per child, and a card in every cell where something is planned. Most parents glance at the week view first thing on Sunday or Monday morning to see what the week holds, then live in the day view the rest of the week as work gets done.
At a glance
- Where it lives: Week toggle in the planner top bar (or
Won the keyboard, or/week) - What it does: five-day grid showing scheduled sessions for each child, with by-child or by-subject views
- Best for: Sunday-night planning, weekly progress glances, quick adds
- Skip if: you’re focused on today — the day view is the doing lens
Where to find it
After setup, Continue to planner → drops you here. Once you’re in, the date pill in the top bar shows the current range — May 4 — 8, 2026 — and the chevrons on either side step you a week back or forward. The Day/Week toggle next to it switches modes; the URL is /week or /day?date=… if you want to bookmark a specific view.
The grid
Each cell is a child × day intersection. In By child mode (the default), children are the rows and weekdays are the columns. Click any empty cell to open the Add an activity dialog pre-filled for that child and that day; click an existing card to edit it or check it off.
The thin bar under each child’s name on the left rail is their progress for the visible week. The label above it — 0/1 done, 3/4 done, Nothing yet — is the same number, shown plainly. The bar fills as you check cards off.
If a card has a small check circle on the right, it’s an activity that’s still open. Click the circle to mark it complete; the card stays where it is but dims. If you’ve turned Hide completed on (more on that below), a checked card disappears from the grid.
Empty cells are clickable too. Clicking an empty cell — say, Matt’s Wednesday — opens the Add an activity dialog with the date and child pre-selected, so you can add a one-off block in two clicks rather than navigating to a separate form.
By child or by subject
The toggle at the top right of the filter bar — By child | By subject — flips the rows of the grid without changing the activities themselves. By child groups everything under each child, which is what most homeschoolers want during the week. By subject groups everything under each subject across the whole family, which is useful for planning lessons or printing a subject-only sheet.
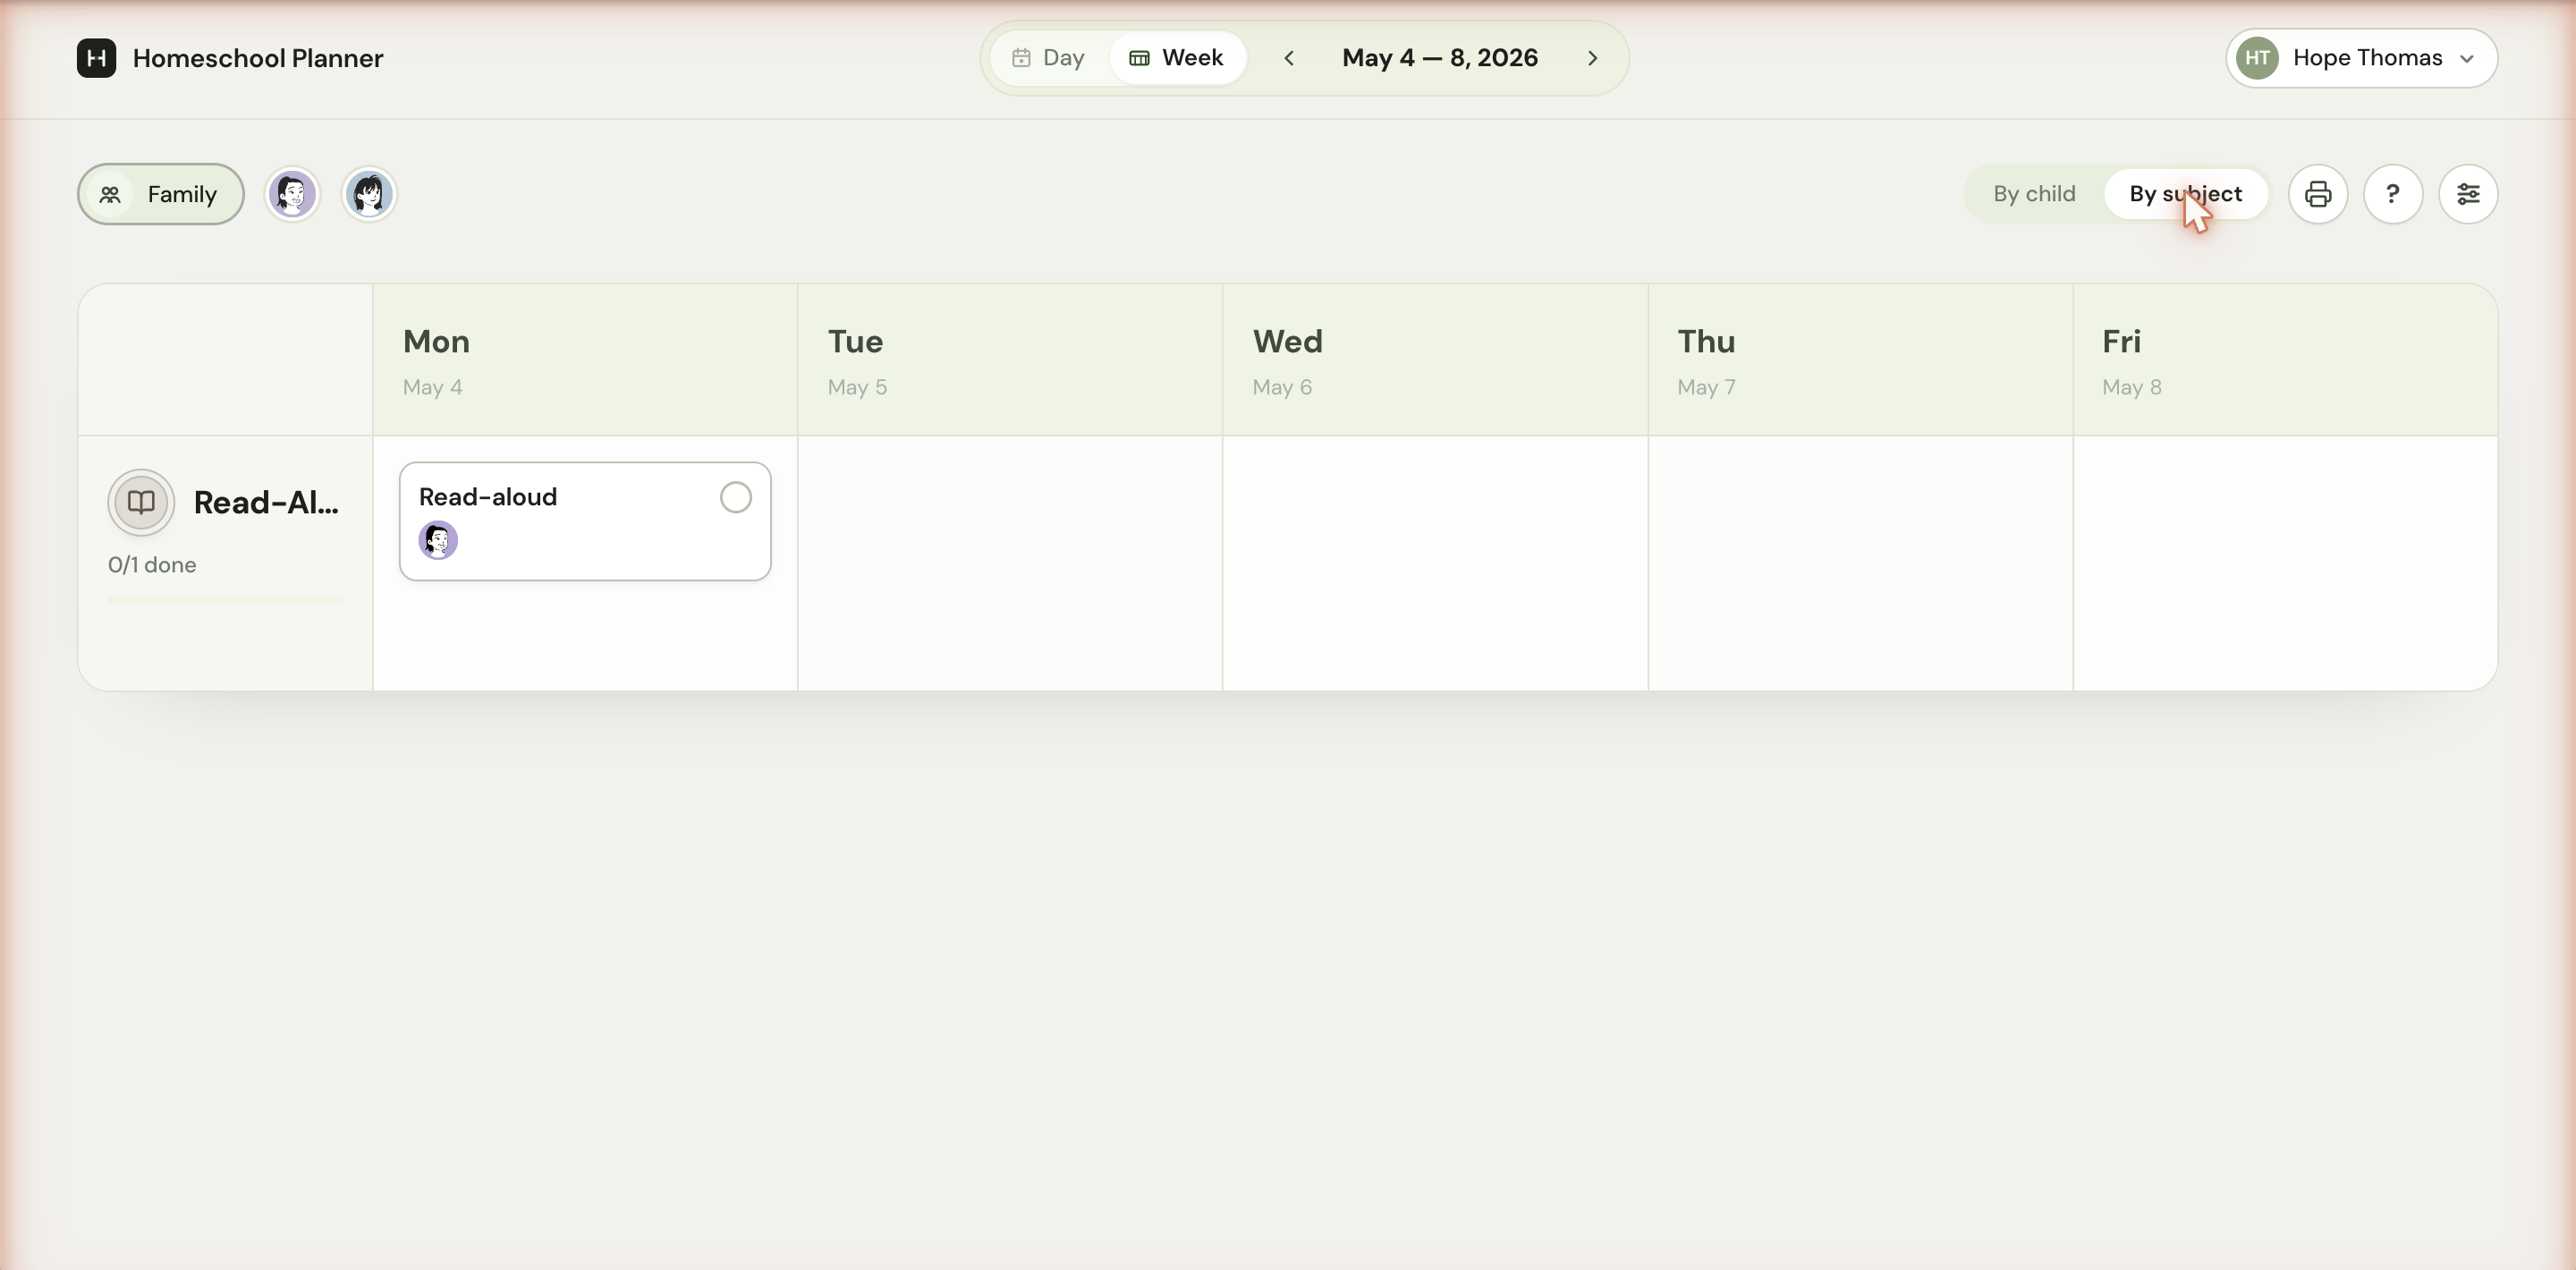
The view you’re in is part of the URL (?view=subject), so you can bookmark or link to it. Some parents bookmark the by-subject view for use during weekly lesson prep on Sundays, then switch back to by-child during the week.
Filtering
The chips on the left of the filter bar narrow what shows in the grid:
- Family (the default) — every child and every subject
- Avatar chip per child — clicking one focuses on that child only. The grid collapses to a single row in By child, or hides everyone else’s cards in By subject. Click the chip again to clear.
The child chips show the colour you picked for them in setup, so you can identify them at a glance even before reading their name.
The day view
The Day toggle in the top bar switches to a single-day list. The header reads Monday, May 4 with a small 0/1 1 thing left status, a print button, and a three-dot overflow menu. Below that is the same Family/per-child filter, then a Today section listing every block scheduled for that date. Each block shows the subject in small caps, the title, and avatars for the children it’s for.
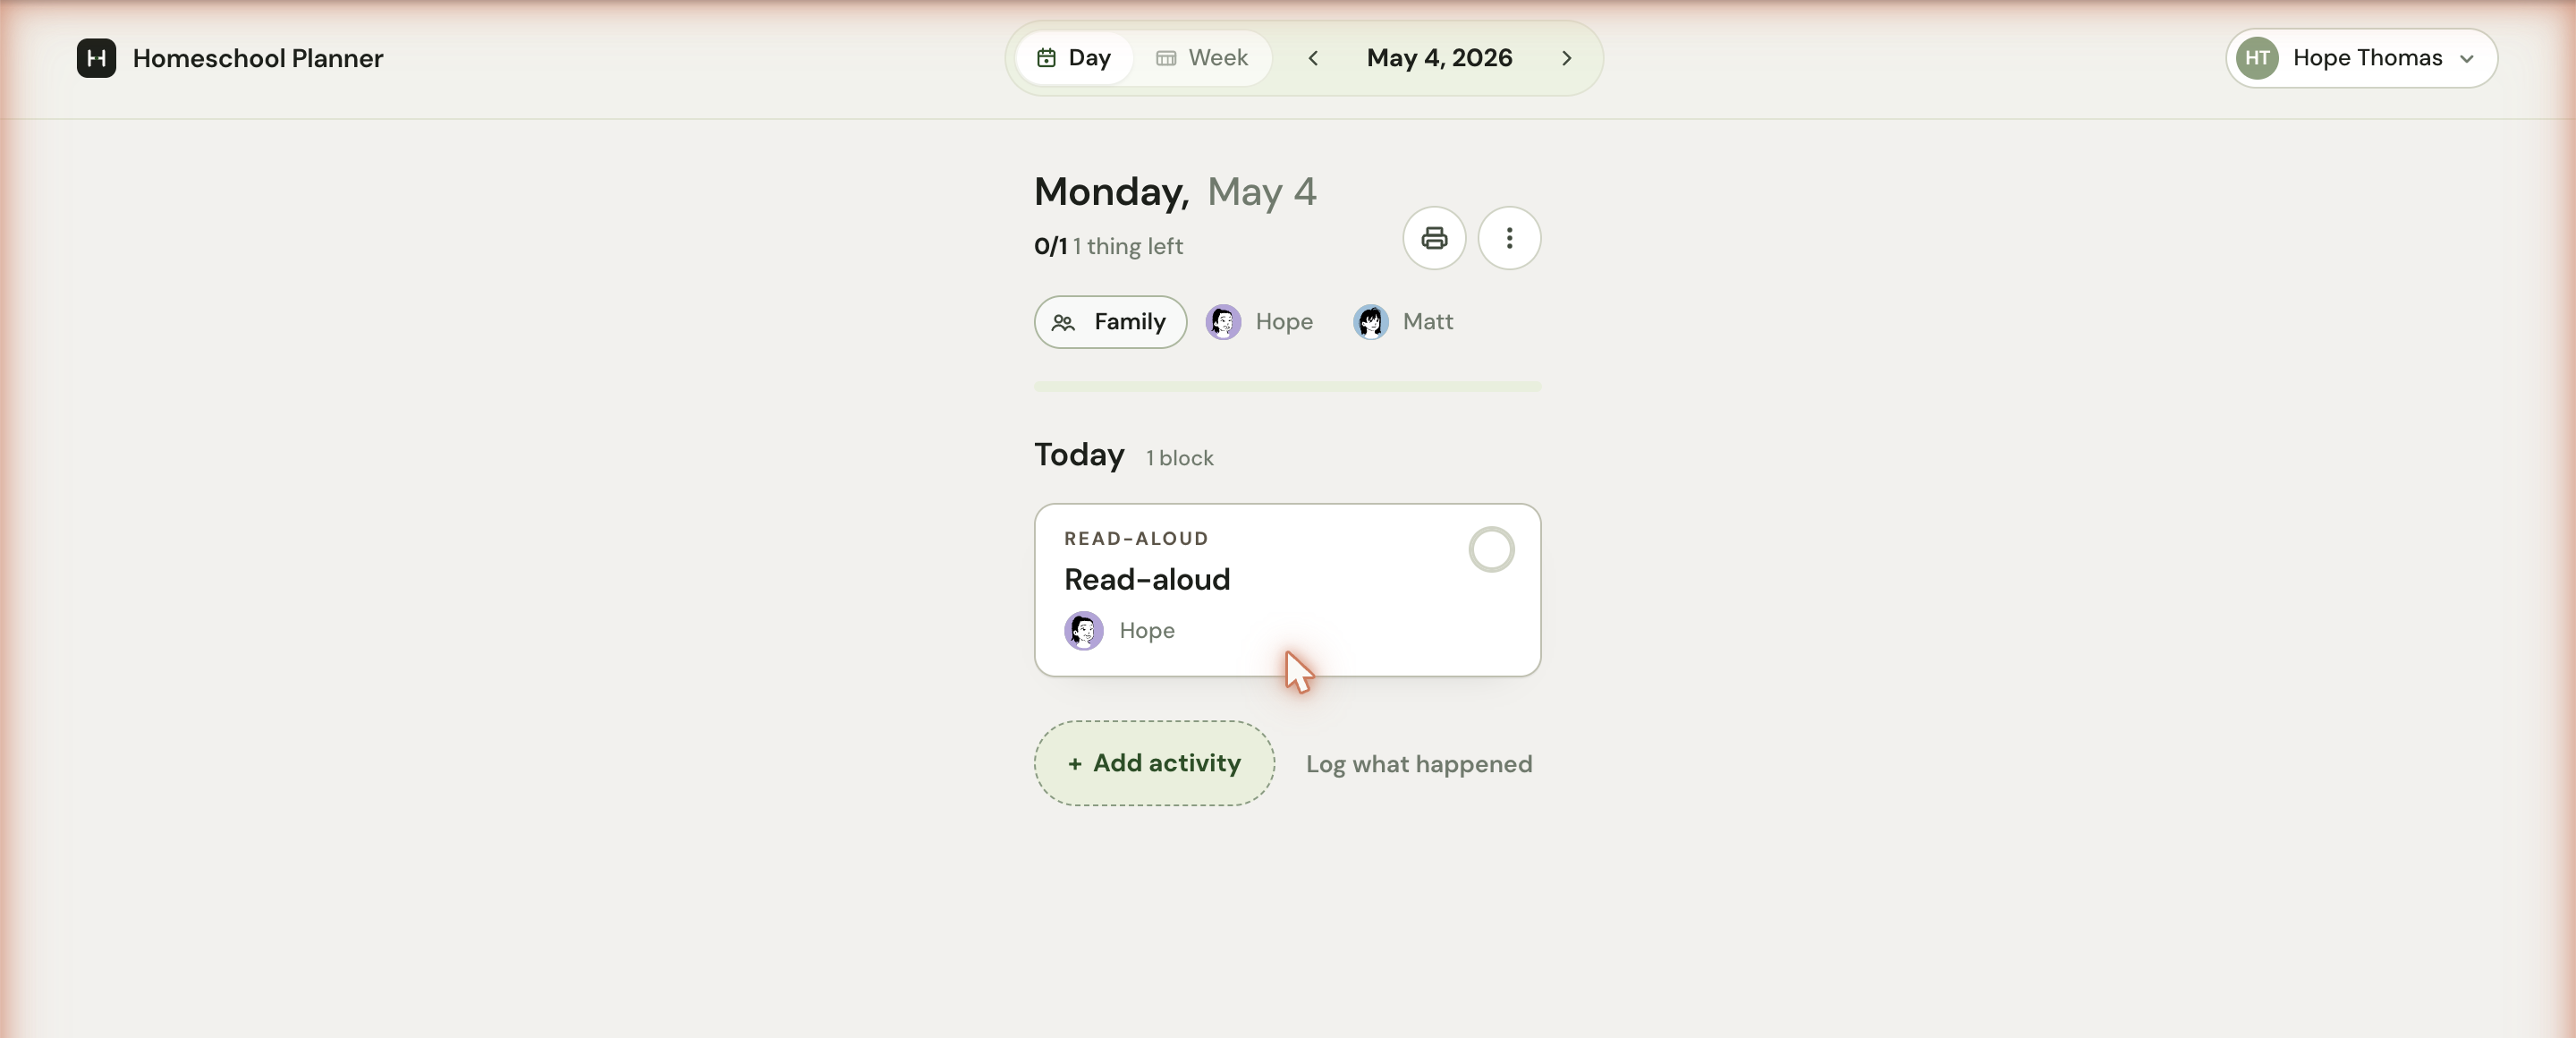
Below the list, + Add activity opens the same Add dialog as the empty week cells, and Log what happened opens a slightly different version of the dialog meant for retroactively recording work that’s already done. See the day view and logging completed work for details.
Adding activities
There are three places Add an activity can come from:
- An empty cell in the week grid (pre-fills the child and the day)
- + Add activity at the bottom of the day view (pre-fills the day)
- The keyboard shortcut A from anywhere in the planner
The dialog has two paths. Say the plan uses the voice memo capture — speak something like “Hope will do math for 30 minutes after lunch” and the planner extracts the child, subject, duration, and time. Type the details opens a short form: title, who it’s for (Entire family or By child), subject chip, date, optional duration, optional time-of-day, and optional notes or checklist.
The settings panel
The settings icon at the far right of the filter bar opens a small panel with three switches:
- Density — Compact tightens cells so a typical week fits without scroll. Expanded (the default) gives titles room to breathe.
- Hide completed — when on, finished cards disappear from the grid. The progress numbers on each row still count them, so the math stays honest.
- Days — School week shows Mon–Fri (the default). Full week widens the grid to seven columns.
A Keyboard shortcuts card at the bottom links to the full list, and School year settings → jumps to the school-year page.
Keyboard shortcuts
If you’re at the keyboard already, the planner is faster than the mouse:
T— jump to today←/→— previous or next day/weekD— switch to Day viewW— switch to Week viewA— add an activityL— log completed work?— show the shortcut listEsc— close any panel or menu
What an empty week looks like
Before you’ve added any scheduled activities or one-off blocks, the grid collapses to a single empty card that reads Nothing scheduled this week — Tap a day’s + to log or plan an activity, or set up a scheduled activity →. The setup link drops you on Settings → Scheduled Activities with the + New activity form ready. As soon as one activity exists in the range, the full child × day grid appears.
Common patterns
A few patterns parents tend to develop:
Sunday-night planning
Open the week view, scan what’s already scheduled, fill in any one-off blocks for the upcoming week (a co-op class, a field trip, a dentist appointment), check that vacations are correctly marked. Five to ten minutes total. The week view’s Sunday-night setup makes the whole week run more smoothly.
Mid-week recalibration
Around Wednesday, glance at the progress bars under each child’s name. If one child is on track and another is behind, you have time to redistribute — bump some Wednesday work to Thursday or Friday, prioritize the behind subject for the next two days, or add a catch-up block for Saturday.
End-of-week celebration
Friday afternoon, the week view shows the full picture of what got done. The progress bars filling completely is a small but real reward — and a good moment to review what worked, what didn’t, and what to plan differently next week.